YOLO 는 기본적으로 1000 종의 class들에 대해 학습이 이루어진 상태에서 부가적인 목적 달성을 위해 Transfer Learning 이 이루어진다. 즉 예를 들자면 자율주행을 위해서 아래의 80 종의 class들로 이루어진 COCO 데이터세트들에 대해 Transfer Learning 을 실시한다.
'person', 'bicycle', 'car', 'motorcycle', 'airplane', 'bus', 'train', 'truck', 'boat', 'traffic light', 'fire hydrant', 'stop sign', 'parking meter', 'bench', 'bird', 'cat', 'dog', 'horse', 'sheep', 'cow', 'elephant', 'bear', 'zebra', 'giraffe', 'backpack', 'umbrella', 'handbag', 'tie', 'suitcase', 'frisbee', 'skis','snowboard', 'sports ball', 'kite', 'baseball bat', 'baseball glove', 'skateboard', 'surfboard', 'tennis racket', 'bottle', 'wine glass', 'cup', 'fork', 'knife', 'spoon', 'bowl', 'banana', 'apple', 'sandwich', 'orange', 'broccoli', 'carrot', 'hot dog', 'pizza', 'donut', 'cake', 'chair', 'couch', 'potted plant', 'bed', 'dining table', 'toilet', 'tv', 'laptop', 'mouse', 'remote', 'keyboard', 'cell phone', 'microwave', 'oven', 'toaster', 'sink', 'refrigerator', 'book', 'clock', 'vase', 'scissors', 'teddy bear', 'hair drier', 'toothbrush'
YoloV3 와 달리 GPU 없이 윈도우즈 아나콘다에 설치할 만한 버전을 아직까지 찾을 수 없는 듯하다.
대신에 리눅스 버전이 있어 Colab에서 실행시켜 보았다. 다소 아쉬운 점은 Colab 에서 직접 video streaming 서비스를 볼 수 없어 일단 저장 후 다운받아 확인하였다.
코드 실행 전에 GPU 를 반드시 설정하자.

Step 1: 구글 마운트 작업을 실시하자. 아직 연결된 폴더가 없는 상태이다.

Step 2: 아래 셀을 실행하면 darknet 이 설치된다.

darknet 의 내용을 살펴보자.

Step 3: 연산속도를 가속하기 위한 CUDA 및 CUDA GPU 를 설치하자.
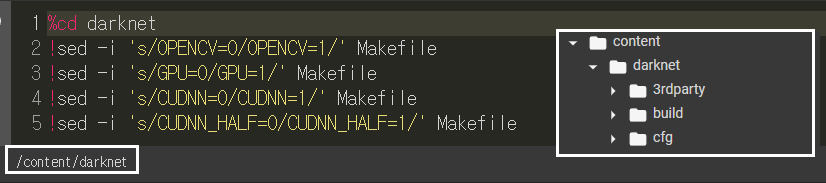
Step 4: make 작업을 실시하자. 1 분 30 초가 소요된다. make 작업 대상 코드들은 C 언어로 작성되어 있어 반드시 make 명령으로 실행시켜 두어야 한다.

Step 5: 80 종의 COCO 데이터세트를 학습한 yolov4.weights 를 다운받아 저장하자.

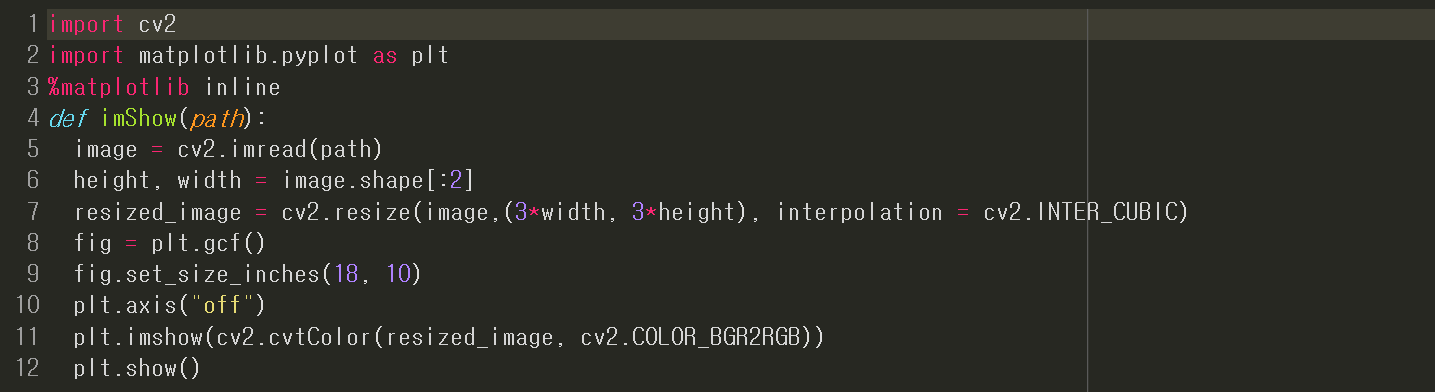
Step 6: 이미지를 inline 출력 가시화 할 수 있도록 유틸리티 matplotlibe 를 설치하여 분석하자 .
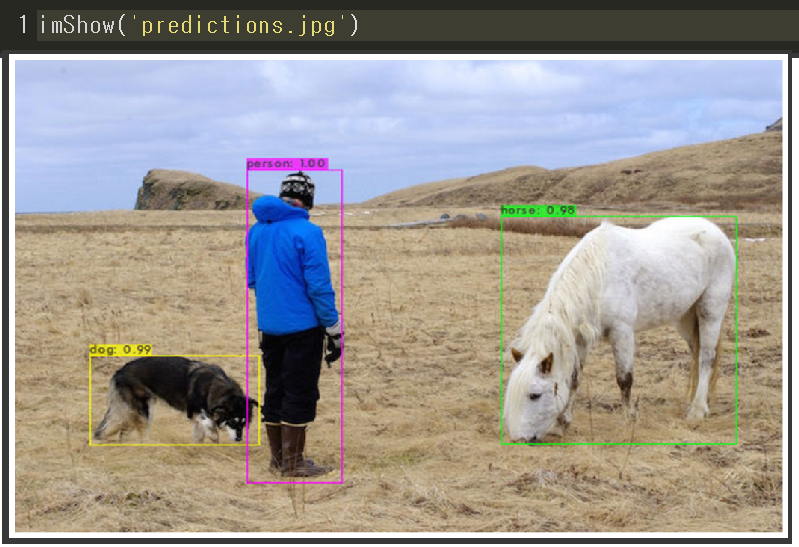
Step 7: CLI(command line instructions) 방식으로 사람이 포함된 이미지를 분석하자.

Step 8. 유틸리티 함수 imShow 로 결과를 출력해 보자.
Step 9. 개와 자전거가 있는 이미지를 command line instructions 를 사용해서 분석해 보자.

Step 10. 유틸리티 함수 imShow 로 출력해 보자.

Step 11. command line instruction 이 좀 길어서 2단으로 표현하였다. 스미트폰으로 찍은 용인 거리 교통풍경 drive.mp4 를 분석하여 driving.mp4 로 출력하였다. 구글 colab 에서는 직접 동영상 스트림 출력이 안되므로 저장 하였다가 한 번 다운 로드 시키면 NDRIVE 에 저장된다. 다시 한번 더 사용자 PC로 다운로드 시켜 저장하자.

| !./darknet detector demo cfg/coco.data cfg/yolov4.cfg yolov4.weights -dont_show /content/drive/MyDrive/drive.mp4 -i 0 -out_filename /content/drive/MyDrive/driving.mp4 |
Step 12. 유튜브에 저장한 동영상 파일을 참조해 보자. 아무래도 GPU 효과로 인해 실행 속도가 충분히 빠름을 알 수 있다.
참조: YOLOv4 Object Detection Tutorial with Image and Video : A Beginners Guide
https://machinelearningknowledge.ai/yolov4-object-detection-tutorial-with-image-and-video/
https://github.com/AlexeyAB/yolo-windows
참조: Colab 에서 YoLoV5 설치
https://macnelearningknowledge.ai/introduction-to-yolov5-object-detection-with-tutorial/
'자율주행' 카테고리의 다른 글
| 캡스톤 코딩 디자인: YoLoV3에 Vision 코드를 추가하여 ADAS 를 코딩하자. (0) | 2022.09.21 |
|---|---|
| LiDAR(Light Detection And Ranging Sensor) 객체감지 및 위치 측정 (0) | 2022.09.21 |
| OpenCV Hough Transform에 의한 차선 작도 VIII (0) | 2022.09.16 |
| OpenCV Hough Transform에 의한 차선 작도 VII (0) | 2022.09.13 |
| Script Editer Spyder에서 Haarcascades OpenCV 보행자 인식 VI (0) | 2022.09.10 |